Classes In
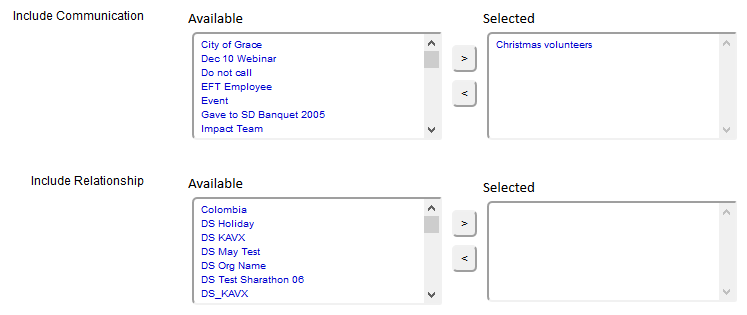
You can see the sections of filters available under each blue bar, but let’s start with Classifications. They are the codes that you have set up and assigned to some of your name records. Let’s say that you want a list of names that have the classification ‘Christmas volunteers’ assigned to them. Click on the Classes In button and select that classification from the first category and move it to the right. (The graphic below shows a cut out from the Classes In page.)
You can close the Classes In window. Now when you run the segment you will get all of the names that have that classification assigned to them.
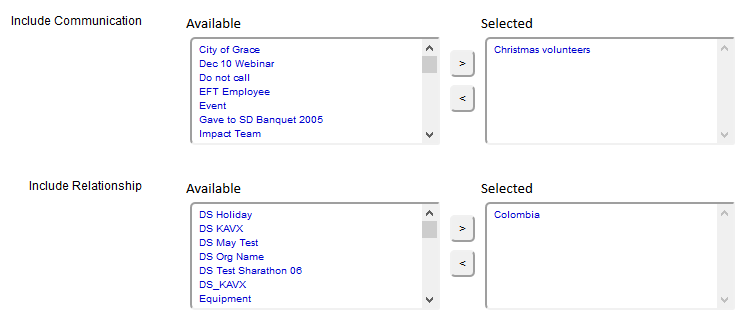
But what if you want everyone who had that classification AND also had the classification ‘Columbia’? Now we can select that from the second category.
Now when you run the segment you get everyone with the 'Christmas volunteers' AND 'Columbia' classifications. There is an AND operator between the categories. That means that the name record must have both classifications selected in their name record to appear in the output.
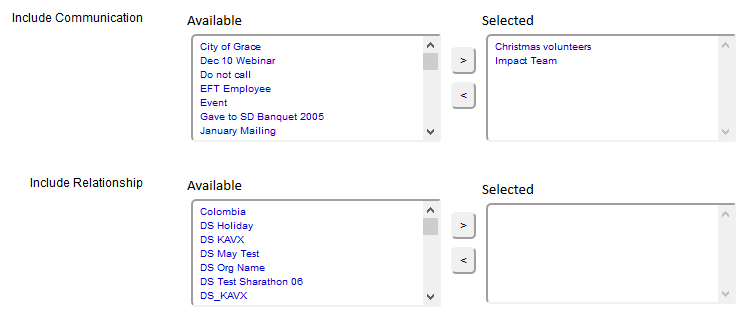
Now let’s say that we want everyone with the 'Christmas volunteers' classification OR the 'Impact Team' classification.
Select 'Christmas volunteers' and 'Impact Team' in the same category and now you get everyone with either the Christmas volunteers class OR the Impact Team class. There is an OR operator between classifications inside the category. The name record must have either of the two classifications to appear in the output.
You can use an unlimited number of classifications as your filters with AND operators between the categories and OR operators within each category.
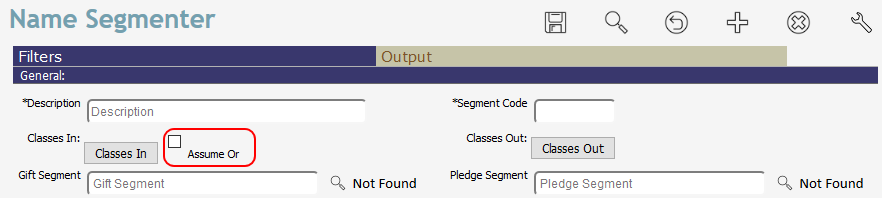
Beside the Classes In button you will find an Assume OR checkbox.
When that is checked, the AND operators between the categories turns into an OR. You can select any classifications in any of the categories and they will have that OR operator. A name record could then have any one of the classifications assigned in their name record and will be in the output.
Classes Out
To the right of Classes In you find the Classes Out button. The window looks exactly the same, however, whatever you choose there will be excluded from the output. You could, for example, create a classification called 'deceased' and assign that to the appropriate name records. Now select that in Classes Out so that when you run the segment Denari will select the names defined by your other filters but will exclude anyone with the Deceased classification. There are many other uses for Classes Out. Another example is 'no mail' for those who have asked you to not send mail.
The selections in Classes Out work the same as Classes In with AND operators between categories and OR operators inside the categories. However, there is no 'Assume Or' with Classes Out.
Classification Update
One of the great things about classifications is that you can select them in Classes Out. This gives you the ability to find selected names by selecting a classification in Classes In but also removing groups of names in Classes Out. To use a very simple example, let's say you want a list of all of the people who have never given a gift. There are other ways to do this in Denari but this is one. First, simply find those who have given a gift and then remove those from your entire list. That leaves you will those who have never given. Here's how you can do that...
1. Create a name segment using the
Giving Statistics section/Gift Amount Range to find those donors who have given a gift.
3. Create a second name segment.When no filters are selected you get all names, you are starting with everyone. Select your 'donor' classification in Classes Out. Now the segment will give you everyone minus the donors leaving you with non-donors.
There are many ways to 'back into' a list of names that you want by using this tool.