TODO: To change the footer's content go to Dr.Explain menu Options : Project Settings : HTML (CHM) Export : Setup HTML Template and Layout
Top Middle Buttons
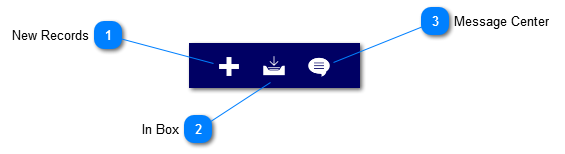
At the top of the page, in the bar running accross the top you will find a set of three buttons.
New Records
Clicking the PLUS button will show you a menu that will allow you to quickly add new appeal codes, batches, fund codes, pledges, and names. You will also find the master list of all of your setup records like funds, appeals, campaigns, departments, jurisidictions, letters, and more.
Since Denari is a web based software, many of your reports and printed statements are prepared on a server in another location and dropped into your In Box. Click the button to open a window that will display the reports and show your their status. If it says "Processing" or "Printing", give it a few seconds then hit Refresh. Once the process is complete, the status will change to "Ready".
Click to open the report. If it is a PDF report, your computer will recognize that and open the program you have installed that will read PDFs, usually Adobe Reader or Adobe Acrobat. If it is an Excel file, follow the instructions to open the report in Excel, if it is installed on your computer. When you click the link to the report in the In Box, from that point forward, the report is being downloaded and viewed in whatever software is installed on our computer. It is no longer in Denari. Once you click the report in the In Box, it will disappear so you may need to print your instructions if you wish to keep them.
Note: Denari has two types of reports. Most run as described above, however, there are some that run in a service called Reporting Services and will not go to your In Box. Instead, they will appear on your screen.
When you send a message to tech support found under the Help/Support button, a reply will come back to the Message Center. A small red number will appear to let you know that there is a message there and how many there are. Click to open the message center box and view the message.
There are three small buttons in the upper left section of the message. The Printer button will send the reply with your original message to your printer. The two small swirling arrows is the Reply button. If you need to reply back to tech support, using this button will include the previous conversation in the message that tech support sees. That will give them a context for your question or problem. The Delete button will delete the message.